Manage Jobs
By adding and
completing jobs manually, admins can further reduce
the waiting time of trucks and loaders. This
helps save costs and optimize
production.
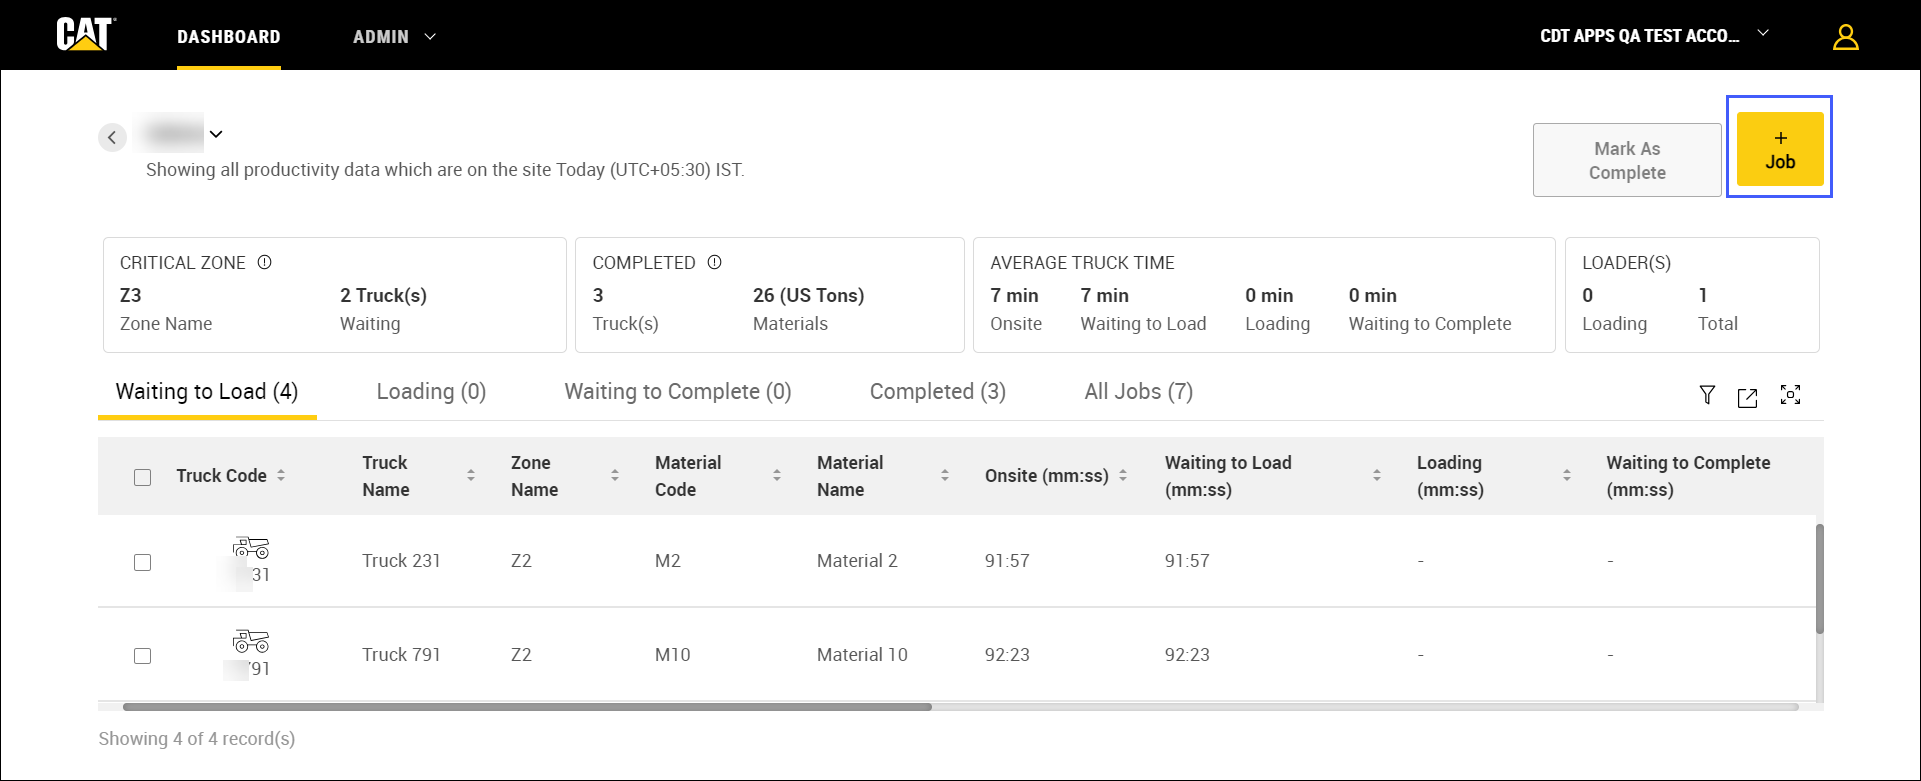
Add Job
To
add a new job:
- In Jobsite
Summary,
click Add
Job
 icon.
icon.
- Enter the required
details:

Truck
Code : Enter
the code for the truck that will perform the job.
Target
Weight: Enter
the material weight to be carried by the truck. The measurement
units will display based on your set preferences.
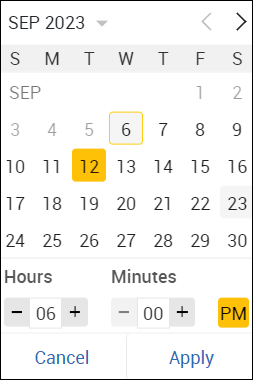
Ready
Date Time:
Select
the expected date and time of job completion
and
click Apply.
Zone
ID, Code and
Name:
Enter the ID,
code
and
name of the zone (within the jobsite) where the truck will be
loaded.
Material
ID, Code and
Name:
Enter the ID,
code
and
name of the material to be loaded on to the truck.
Click Add to save and confirm your
actions.
Note:
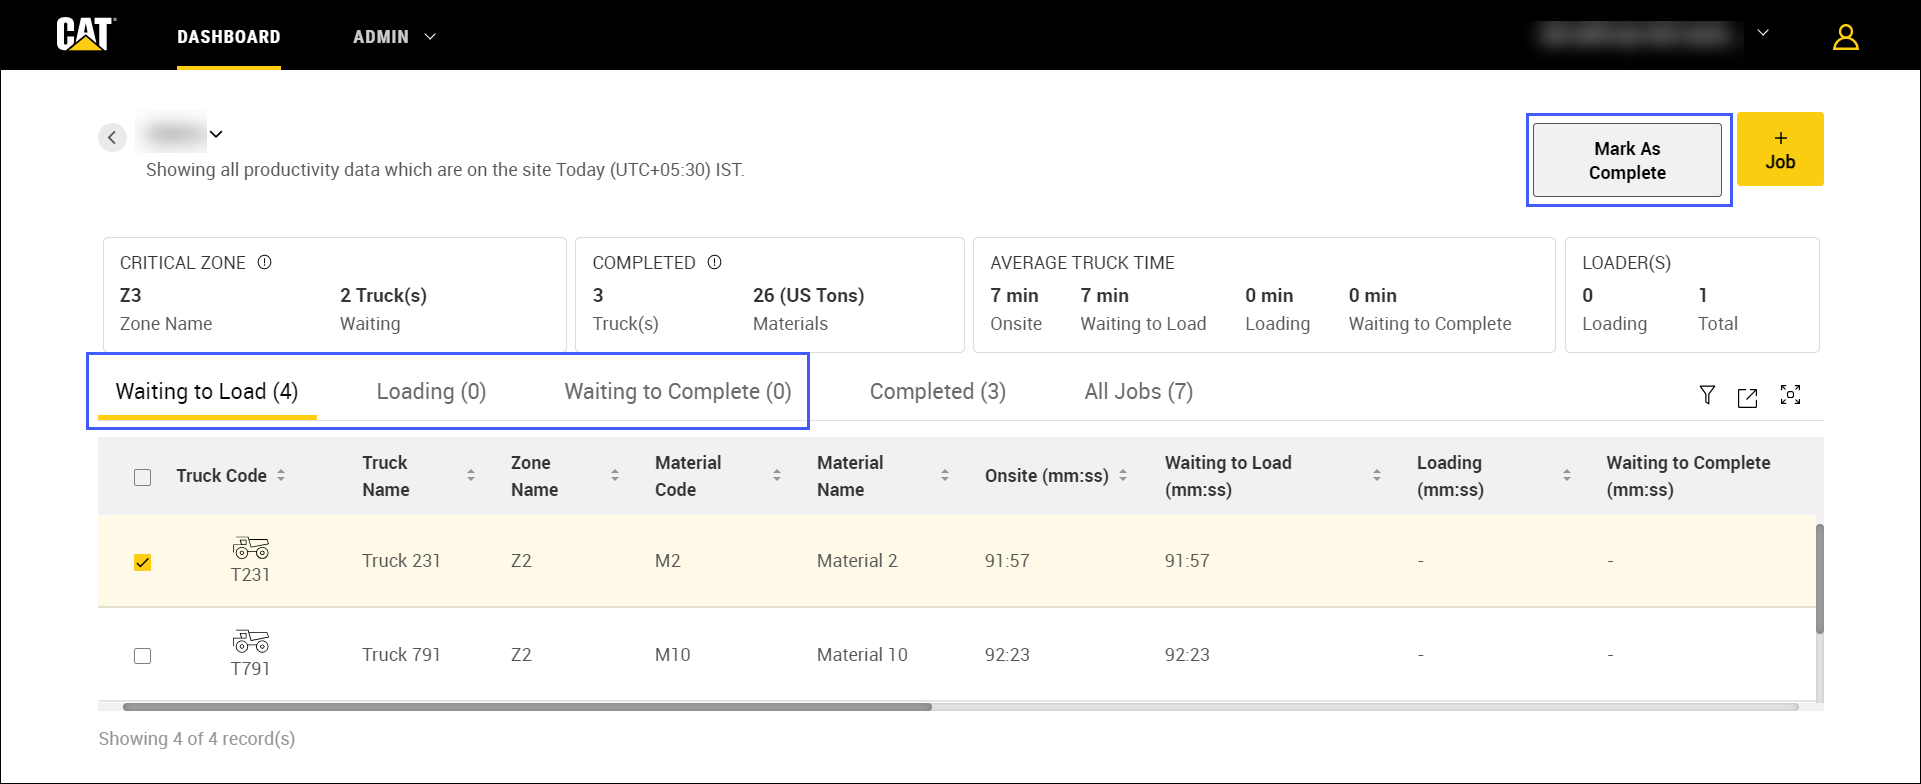
Complete Job
Check
 the
desired job listed under Waiting
to Load, Loading,
Waiting
to Complete tabs
and click
the
desired job listed under Waiting
to Load, Loading,
Waiting
to Complete tabs
and click  icon to mark the job as
complete.
icon to mark the job as
complete.
Possible Scenarios in
Add Job Page:
Case #1:
Admin tries
to create a job with a
truck code, but
there’s
an existing job with the same code under Completed tab.
In that case, a new job will be created
Case
#2: Admin tries to create
a job with
a truck
code, but
there’s
an existing job with the same code under Waiting
to Load
tab. In that case, the existing job
will be updated with new values.
Case
#3: Admin tries
to create a job with a truck code,
but there’s an
existing job with the same code under Loading
or
Waiting
to Complete tab.
In that case,
neither the
existing job will be updated, nor will
a new job
be created.
Note:
The success
message will still be displayed.
 with are mandatory to add a job.